
Class Creator Tools are designed to help schools make the best classes possible and handle lots of data easily.
Watch this video for an overview on the Class Creator Tools available:
Alternatively, here is a breakdown of the tools available:
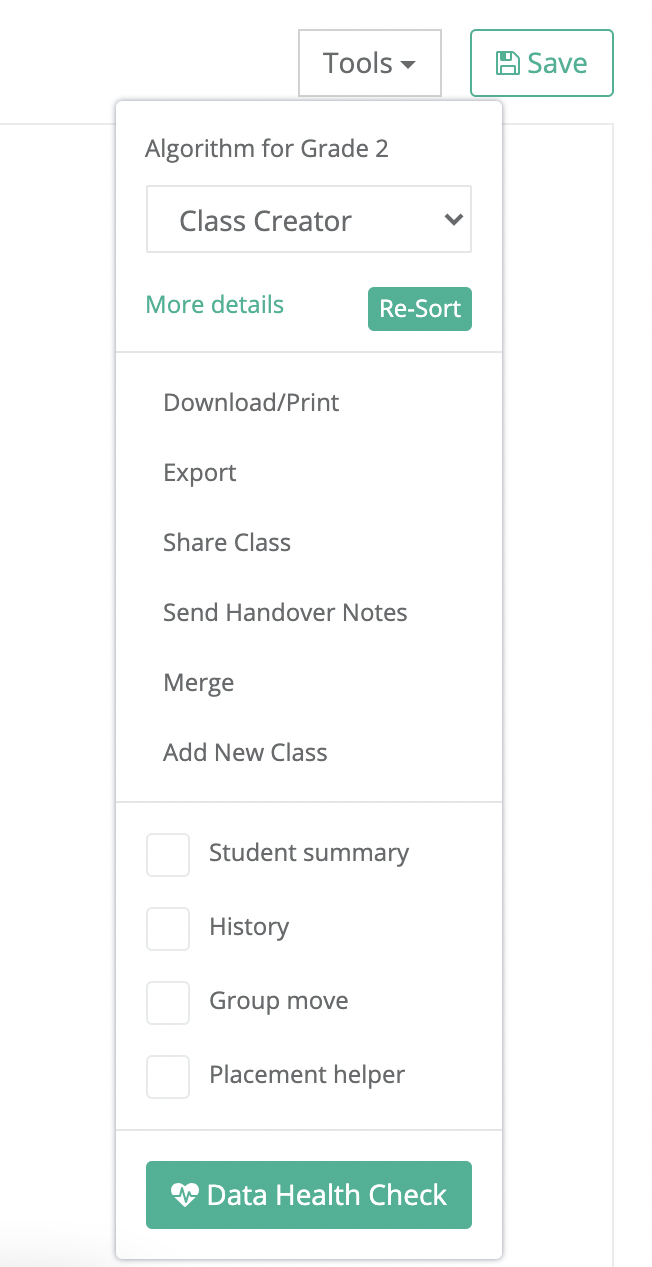
Alternate Algorithms
We understand that every school/grade level has different placement requirements. That is why we have developed multiple placement algorithms that prioritise class compositions differently.
The selected algorithm will only be applied to the Grade Level you are currently viewing, so you can select a different algorithm for each grade level.
Click here for more information on using Alternate Algorithms.
Re-Sort
Click resort to shuffle students. Using this button will provide a different sort of the students using whichever algorithm you have selected.
You can click re-sort as many times as you need until you find a starting point you are satisfied with.
As you know your students better than anyone, manual movements are then recommended to achieve the perfect composition.
Save
If you have made changes to a class you must save them or they will be lost.
We recommend you save classes in one of two ways:
Year/Grade Level:
Recommended for schools with straight or non-overlapping multi-age classes.
Examples:
Grade 5 v1
Grade 5 v2
Whole School:
Recommended for schools with overlapping composite/split grades (1/2 , 2/3 , 3 , 3/4).
Example:
Whole School v1
Whole School v2
Admins also have the opportunity to overwrite the file they opened to include any changes they have made, or to save a new version.
Download/Print
Download/Print is designed to allow schools to produce a hard copy of their new classes.
Classes are downloaded as a Word Document.
When you select Grade Level View or Class View the Download/Print will be different for each...
Grade Level View: Download all the classes in a single grade level. Ideal for sharing classes as a whole for feedback.

Class View: Download individual classes and student information. Ideal information for the receiving teacher of the new class. We call these handover notes. To select a different class click on the class name on the left (eg. 1C in the image below)

Export
Export is designed to be integrated with other student management systems.
Grade/Year Levels are exported as a CSV file (Excel Spreadsheet).
The Export file is commonly used to store data, share classes or to add back into an SMS.
When you Export your new classes it includes:
- Student ID
- First Name
- Last Name
- Gender
- New Year Level
- New Class
You also have the option to include these fields in the export:
- Export student admin notes
- Export student teacher notes
- Export assigned teacher
- Export student current year
- Export student current class
- Export student Behavior level
- Export student Academic level
- Export student ESL level
- Export student 'Special Education' tags
- Export student tags
Share Class (Feedback)
Sharing classes allows school administrators to receive feedback from any teacher in the school.
NOTE: Classes must be Saved before the can be Shared.
Click on the Tools dropdown.
Then click the Share button.
Select the teachers you wish to share the classes with, write them a quick note and click Send.

Teachers will only see the classes displayed on the screen when share is selected, they will not have access to the entire school. Teachers will not be able to see any admin notes or assigned teachers.
All teacher feedback will be listed under the saved classes when it is opened by an Administrator.
You can share classes multiple times.
Send Handover Notes
To share next years classes with teachers, you can send handover notes.
This will send class lists and data to the teachers assigned in the selected grade level. Teachers will be sent a unique link to download their individual class.
Admin notes and Student/Teacher separations & pairings are not part of the handover notes.
Merge
The merge tools allows you to make a master document by collating saved versions on individual year groups.
When a year group has finished creating their classes and have saved their grade
e.g. Grade 5 v3 or Grade 2 FINAL you can collate these individual grade levels into a single whole school document.
To create your Master Document see our section on saving files. Choose an appropriate name such as ‘Whole School Merged’
Merging into a Master Document
- Select ‘Classes’ from the left-hand side menu
- Select ‘Create Classes’
- Choose ‘Open Saved’ and select your master document.
- Click on the tab of the grade level you want to merge into this document, e.g. ‘Grade 4’
- From the tools menu, select ‘merge’.
- From the drop down menu, choose the version you wish to merge e.g. ‘Grade 4 v3 FINAL’.
- Click ‘Merge Classes’
- Repeat (steps 4 to 7) for any other grade levels you wish to merge.
- Remember to save your master document before exiting.
Remember: Discuss with your teaching teams prior to class creating to decide on a naming system for their files so you are able to easily identify which is their final/approved/updated version.
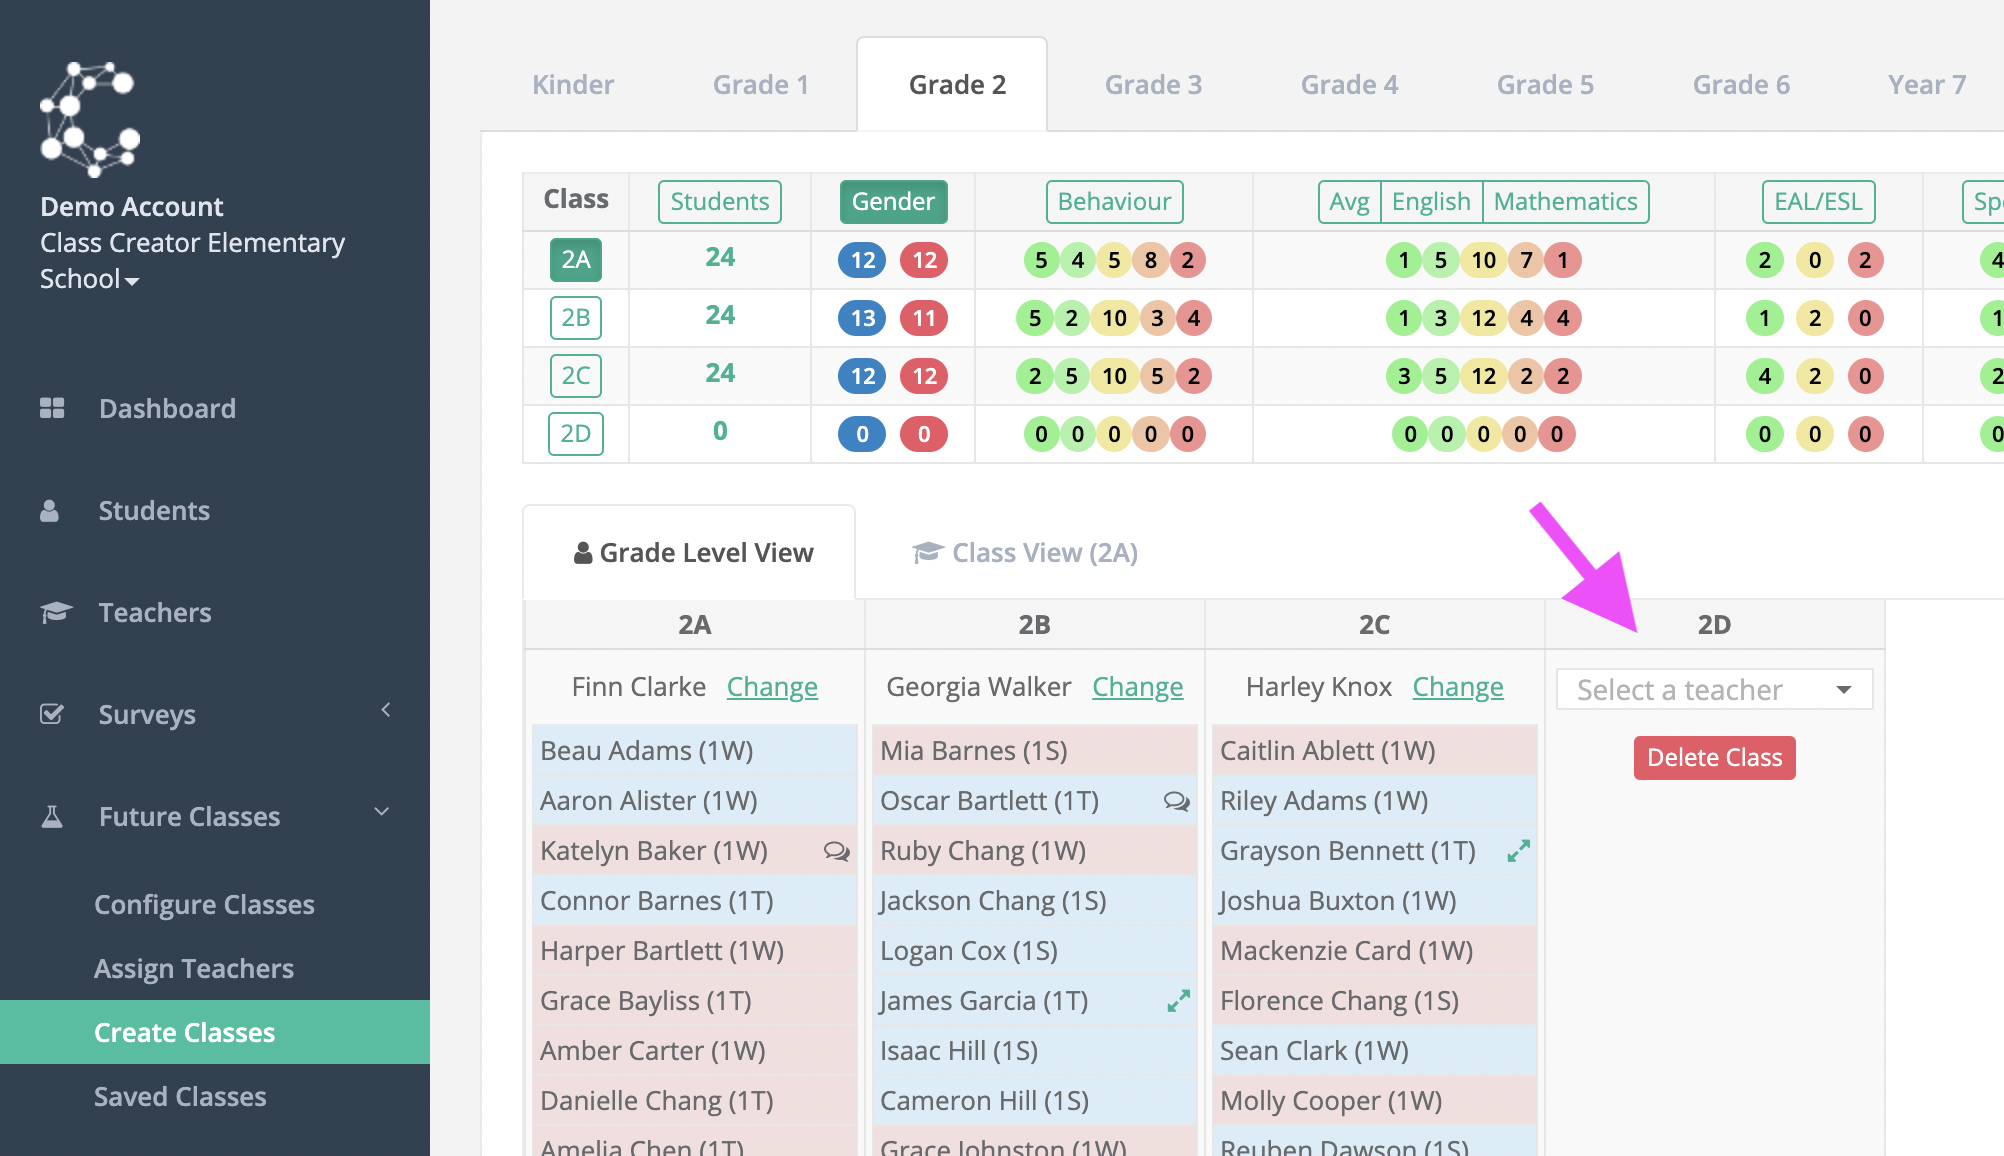
Add New Class
If after creating classes and making edits you need to add an extra class, you can use the ‘Add New Class’ tool.
When selected it will add a blank class to the year level you are currently viewing. This will allow you to drag and drop students into that class.
If you would like to create a new composite grade, you will need to add a new class to each of the grades levels you will have in that composite and will add only as many students as required to make up the two halves of the class.
If you no longer require the extra class, it can be deleted provided there are no students in the class and there is no teacher assigned.
Student Summary
Student Summary displays the colour-coded data for each student in regards to:
- Behaviour
- Academics
- ESL/EAL/ESOL
- Special Education
Student Summary allows educators to make informed placement decisions when editing classes/student placements.

Student History
Student history is often very important when making placement decisions. That’s why we have made it easily accessible :-)
When History is on a H is displayed next to each student. When the H is clicked it will show students current information, plus any historical separations.

You can also view a student’s Full History, which will display all the student's data year-by-year:
- Teacher
- Behaviour
- Academics
- Special Education
- Special Education Tags
- ESL/EAL/ESOL
- General Tags
- Notes
- Separations
- Pairings
- Preferences
Group Move
Class Creator uses the survey data to place students in positive social groups. Our goal is to meet separations, pairings and preference requirements within these small groupings where possible.
Group Move allows administrators to edit classes by moving these “positive groups” as one, rather than individual students.

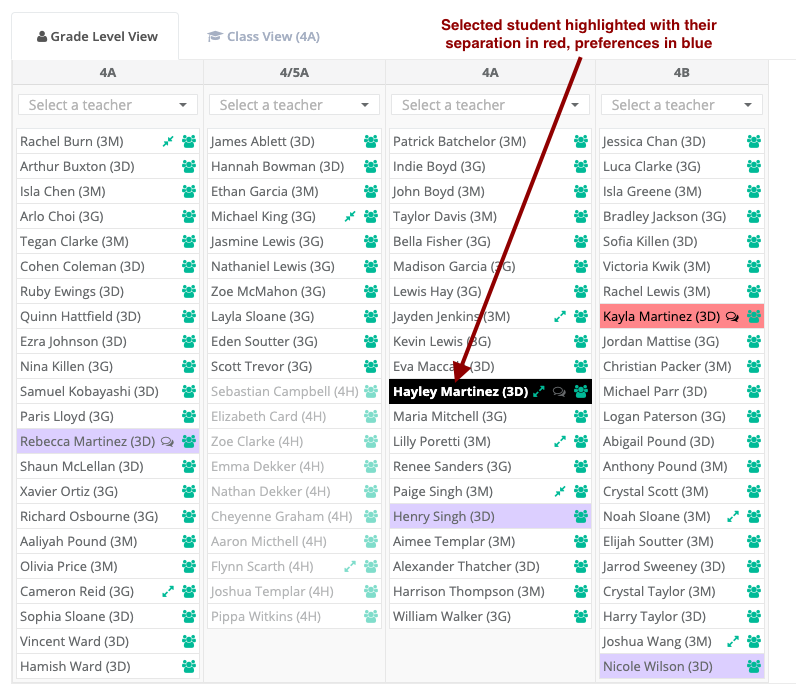
Placement Helper
Placement helper can be selected so that you can easily see where students pairings, separations and preferences are located.
When Placement Helper is selected, you can click on any given student and see which classes their friends are located in or where they need to be placed based on separations and pairings. You can then manually move accordingly.
Data Health Check
Data Health Check allows you to quickly identify areas where you survey data may be impacting on Class Creator's ability to make balanced classes and met individual student requirements (separations/pairings/preferences). Click here for more information.